Fruit, Home Decor, How to Craft Idea's, Spring
Fabric Orange
Jun

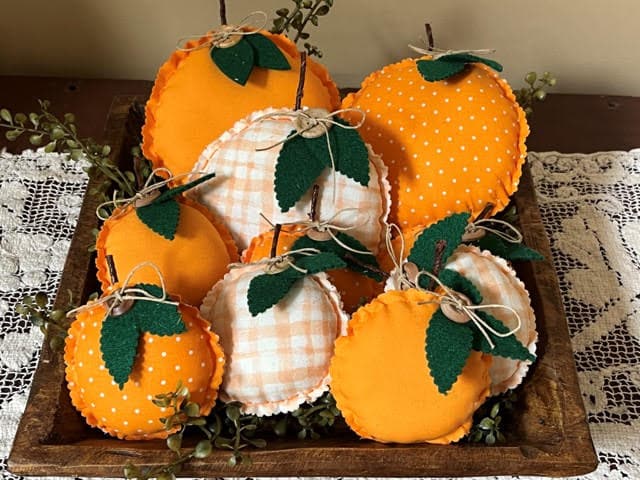
Summer brings all the fresh fruit so I thought I would start making different fruits to use in my home décor. If you check out my other blogs you will see I have done lemons, limes, strawberries and now oranges! I am going to start working on peaches next so make sure you check back to see how to make some peaches to add in with your other fruits.
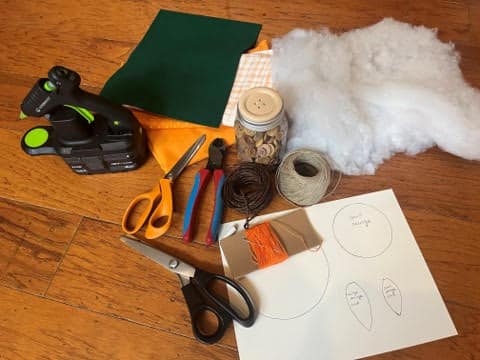
Materials I Used
- Pattern for the oranges and leaves
- Orange fabrics of your choice
- Felt in the color Kelly Green
- Orange #5 DMC thread in orange or a crochet thread
- Polyester fiberfill
- Grapevine wire in brown
- 18mm Wooden buttons for the small oranges and 22mm buttons for the large oranges
- Hemp cord #20
- Needle
- White piece of chalk
- Scissors & Pinking shears
- Wire cutters
- Hot glue gun and glue sticks
- Fabric Orange Pattern
Cutting out and sewing the oranges
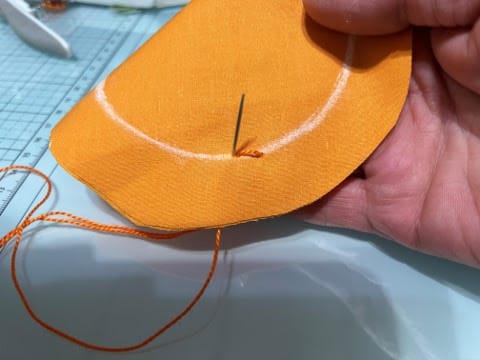
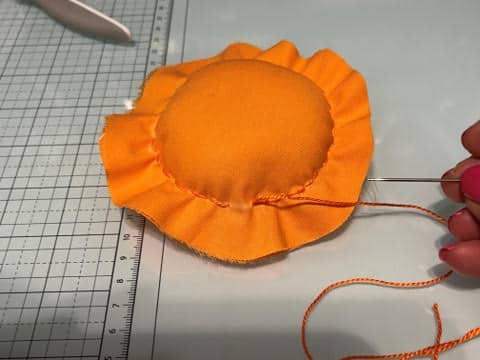
The first thing you will need to do is print and cut out your pattern pieces. The following steps are the same for the small and large orange . Lay your orange pattern onto a double layer of fabric (the print is facing out) using a white piece of chalk trace your orange then cut out about a inch or more away from the trace line.

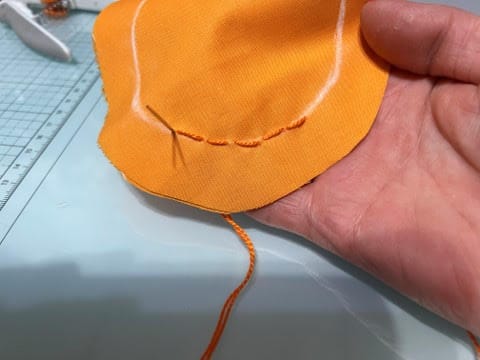
Using your orange thread and needle you are going to sew around the orange leaving a section open for stuffing. You want to make about 1/4” stitches or so. Insert the needle up from the back make a stitch bringing the needle to the back then bring your needle up right next to the stitch you just made, I hope this makes sense you can look at the photo’s below. You want your stitches to be close together on the front of the orange. Sew around the orange until you reach close to where you started. You want to leave an opening for stuffing. Leave the thread and needle attached for sewing closed after stuffing.

Stuffing and trimming the oranges
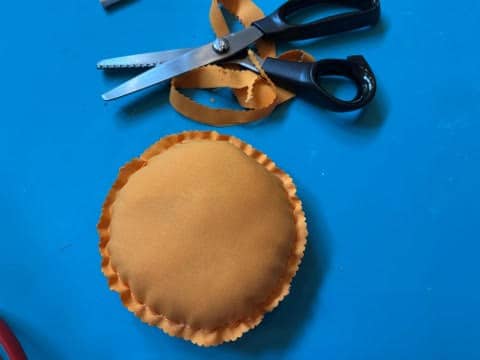
Using the fiberfill stuff your small oranges firmly. The large oranges I did not stuff firmly I did not think the large orange look good big and puffy so I lightly stuffed but I will leave that up to you. After you have your orange stuffed finish sewing closed ending at the back of the orange. Knot and trim off excess thread.
Using pinking shears trim around the orange.
Cutting out and attaching the leaves, stem and button
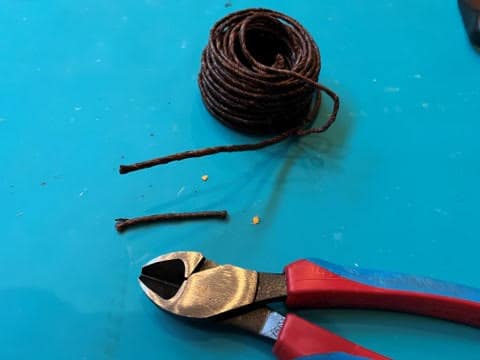
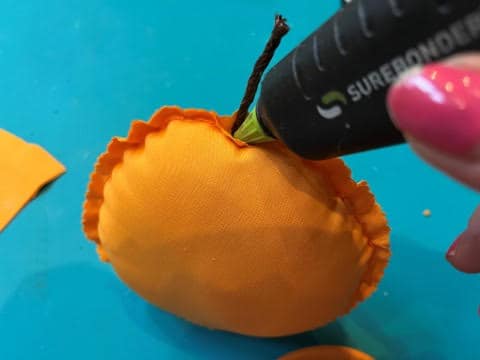
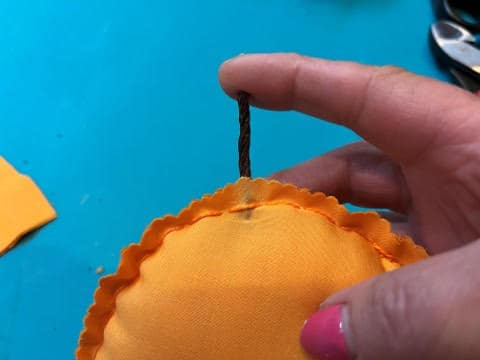
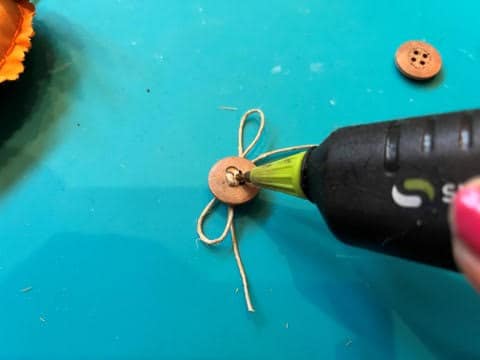
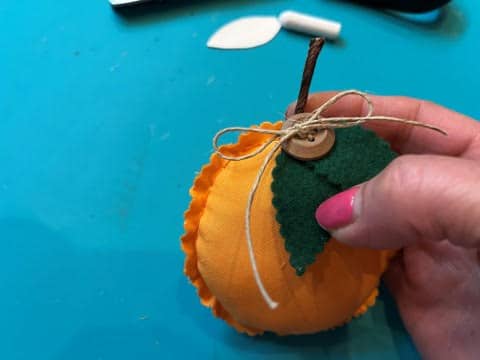
Cut a piece of the grapevine wire long enough for the stem of your orange. Place the stem into the orange between the pieces of fabric. You should be able to fit the stem at one of your stitches. Make sure the stem is where you like it then remove the stem add a little hot glue down into the orange and add your stem.
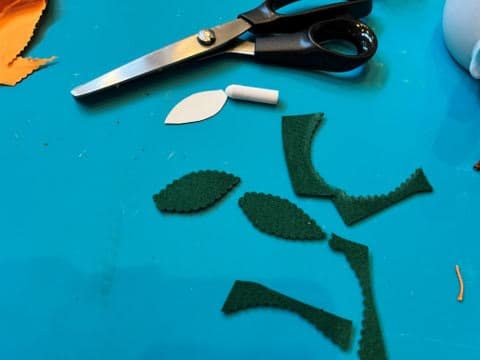
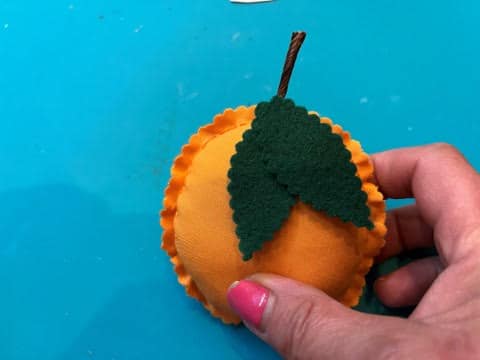
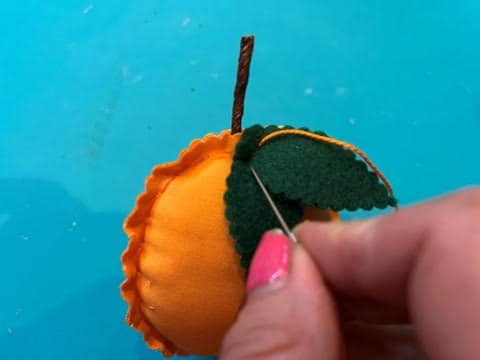
There are two size leaf patterns one for the small orange and one for the large orange but the following directions are the same for both sizes. Trace and cut out two leaves for each orange from the green felt, I used the pinking shears to cut out my leaves but that is up to you. Place your leaves one on top of the other at an angle at the top of the orange under the stem. Using your orange thread and needle sew the leaves to the orange ending up at the back of the orange. Knot and tri off excess thread.
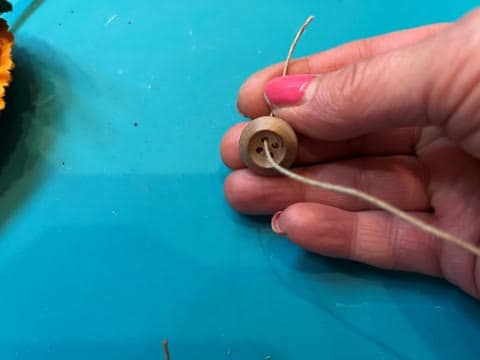
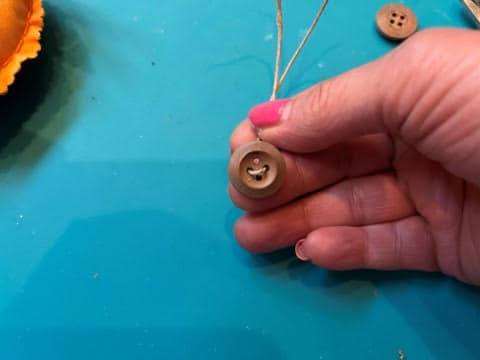
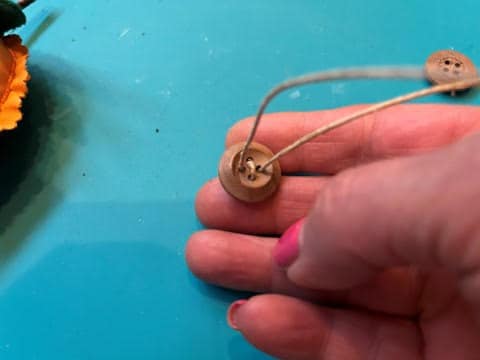
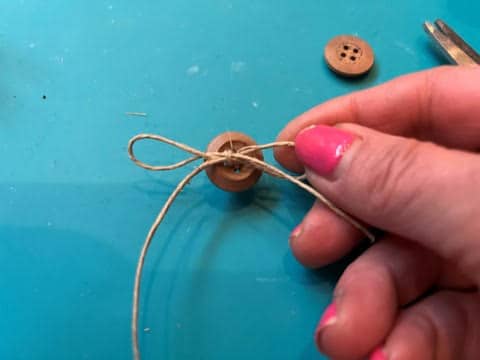
For the small orange you are going to use the 18mm wooden button and for the large orange you will use the 22mm wooden button. The following directions are the same for attaching both buttons. Cut a piece of hemp large enough to feed through the button and make a bow. From the top of the button feed one end of the hemp through one hole of the button then feed the other end of the hemp through a second hole bringing both ends to the back of the button. Adjust the hemp so both ends are even then feed one end through a empty hole up to the front of the button, repeat this step with the other end of hemp. Next you are going to tie the hemp into a bow. Trim off some of the ends if they are to long.
You are now all finished with your orange! I hope you enjoy making the oranges and make the lemons and limes from my other blogs.