Home Decor, Outdoors, Thrifty Makeovers
Teapot Garden Girl
May
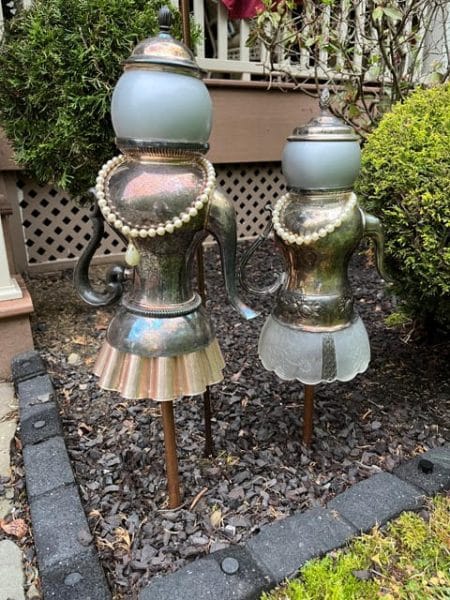
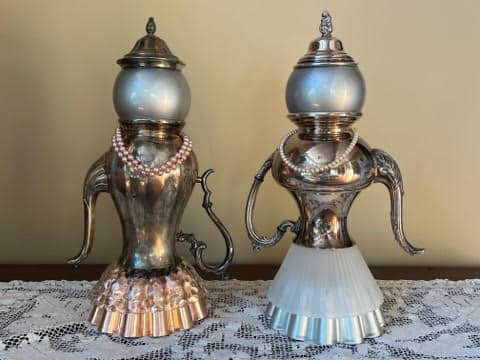
If you have been following me you know I love vintage silver and I love finding ways to upcycle it. The teapot garden girls have to be one of my favorite ways to upcycle a vintage teapot or coffee pot. Do they not just look darling in the yard? Now I am going to try and make a small version using a vintage sugar bowl I just need to find all my pieces.
Materials I Used:
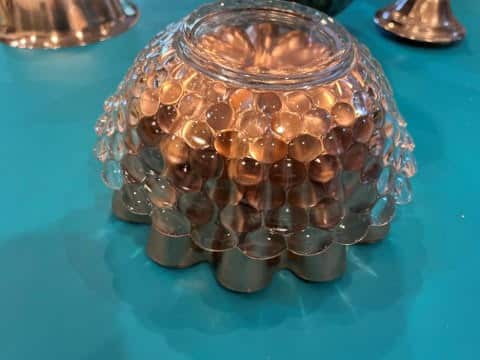
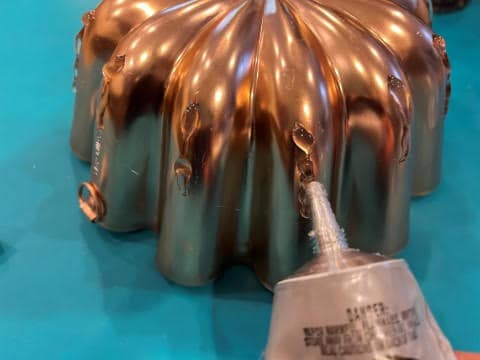
Vintage silver teapot or coffee pot I like to use the ones that do not have legs on the bottom I just feel it looks better but you can certainly use one with legs. You will want to find items to use as her dress I used a silver bowl and a metal jell-o mold on one and a silver bowl and a glass light shade on the other. You are going to want a bowl to fit up into the teapot then you will want a item that will fit up into the bowl. Have fun with this you can make adorable dress parts using all different items.
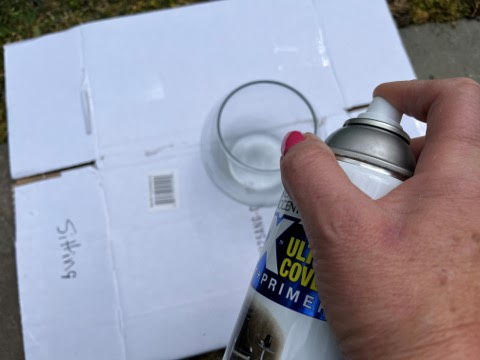
- You will need a round glass candle holder that will fit on top of the bottom of the teapot. I used the one from the dollar tree.
- Rust-Oleum metallic aluminum spray pant
- ½” PVC Box adaptor you can find this in the electrical isle in Home Depot
- A piece of ½” pipe cut to the length you would like. I used a copper pipe because I like the patina of t he copper pipe as it ages.
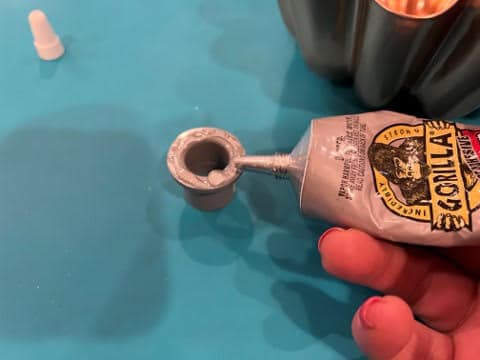
- Gorilla Clear Grip Adhesive
- Needle nose pliers
- A fun necklace (optional). I got my necklaces from goodwill.
Painting the candle holder & adding the PVC box adaptor
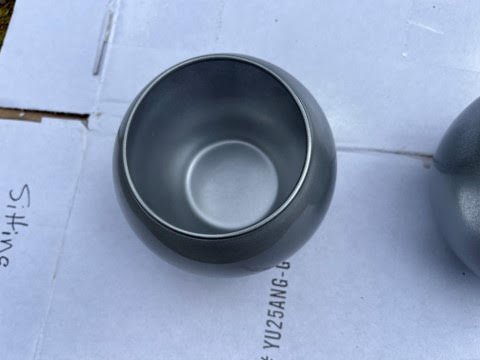
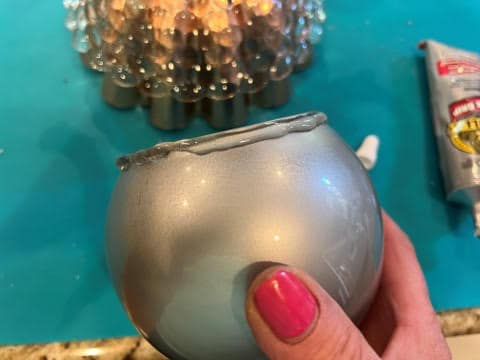
The first thing you will need to do is wash and dry all your items so they are clean. In a well ventilated you are going to spray the inside of the glass candle holder with the metallic aluminum spray paint. Paint the inside by just doing a light spray at a time and letting it dry in-between coats.
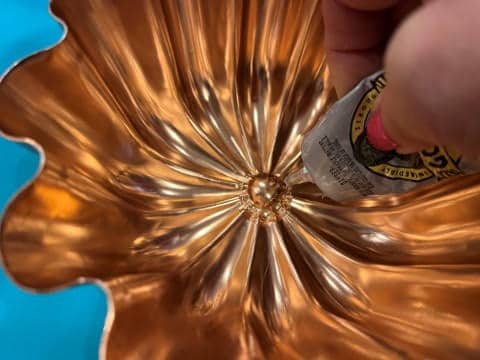
You are going to need to attach the ½” PVC box adaptor to the inside bottom of the dress. If you are using two items that have a bottom you are going to attach it to the inside of the bottom piece if one of your pieces don’t have a bottom such as the glass light shade I used you will need to attach the ½” PVC box adaptor to the bowl that is going up into the teapot.
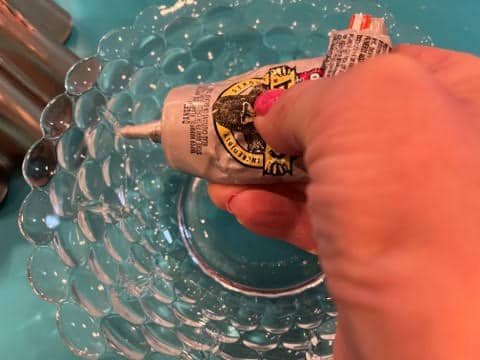
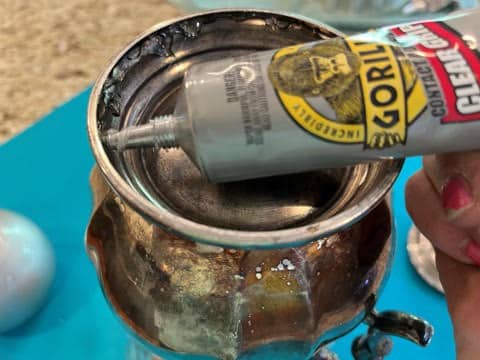
Add clear grip adhesive to the wide flat part of the PVC box adaptor then add the gorilla clear grip to the inside of the bowl where the adaptor is going. Let the adhesive set for a minute or two this will help the adhesive grip faster. Place the adaptor inside the bottom of the bowl and press down. You are going to want to let this set for about 10 or 15 minutes before moving on to the next step.
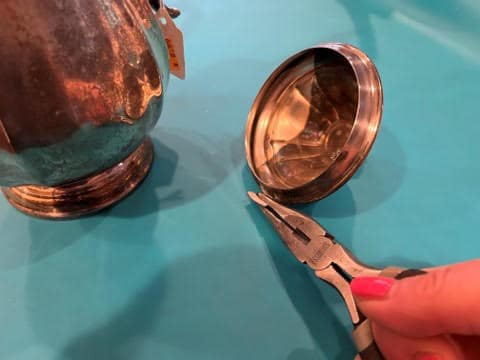
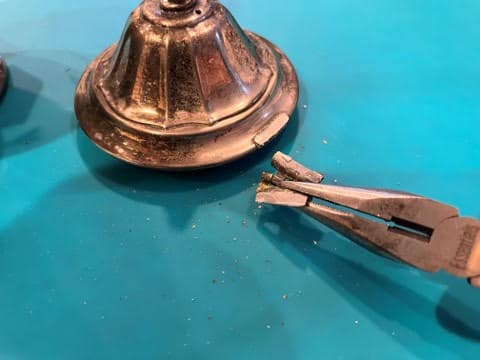
Preparing the teapot
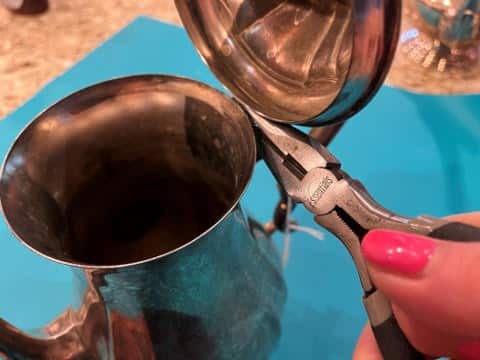
While you are letting the adaptor adhere you can move onto this step. Using a pair of needle nose pliers you are going to remove the piece that attaches the lid to the pot. First grab the part that is attached to the pot and work it back and fort with the pliers until it comes off the lid. Repeat this step to the part that is attached to the lid.
Finishing the dress
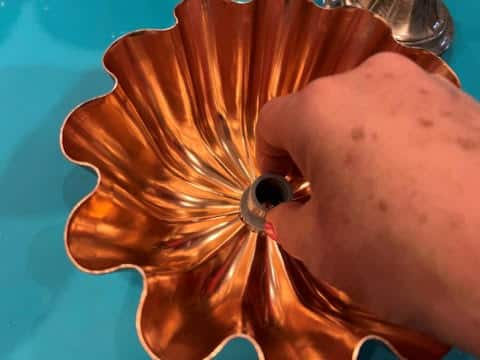
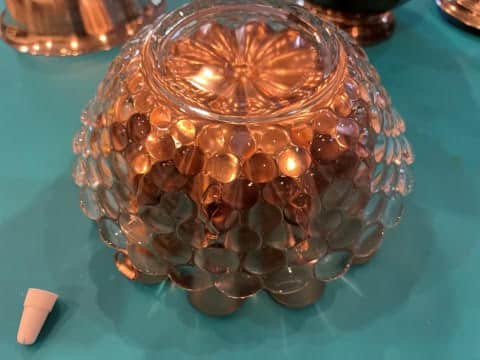
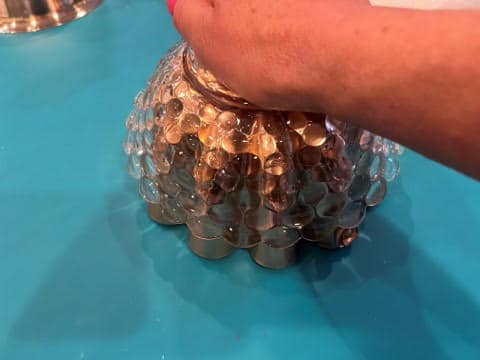
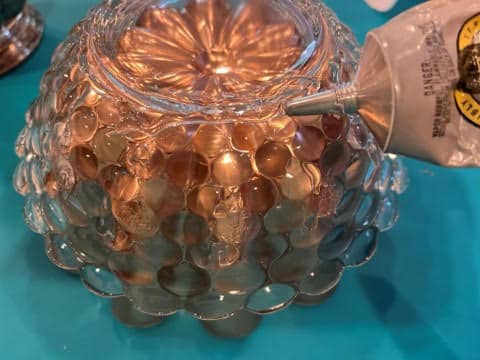
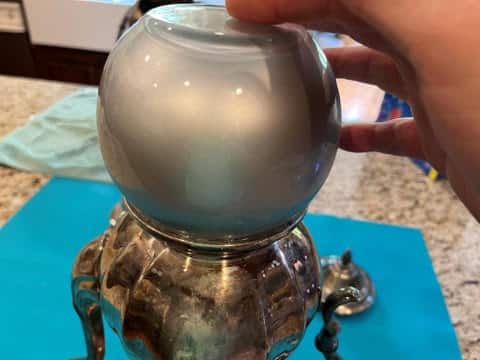
Turn your piece with the adaptor over and make sure it has adhered enough so it won’t fall off. Next depending on what piece you attached the adaptor to you are going to either place the piece on top or under your next piece to see where they touch together. Remove the piece if your add the gorilla clear grip adhesive around the outside where the two pieces touch together then lightly place the other piece on top then remove. This will tell you where you need to add the adhesive around the second piece. Add a little move adhesive around the first piece. Let the pieces set for about one or two minutes then attach them together. I like to place something heavy on top to help it adhere good. Make sure they are straight and stay straight if you place something heavy on top. Let this sit for about 10 or 15 minutes before moving on to the next step. You will see in the photo’s below that I am using a metal jell-o mold and a glass bowl for this teapot girl.
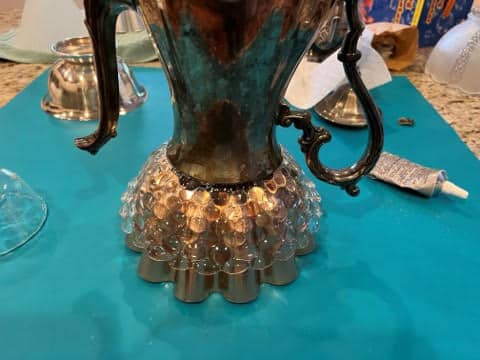
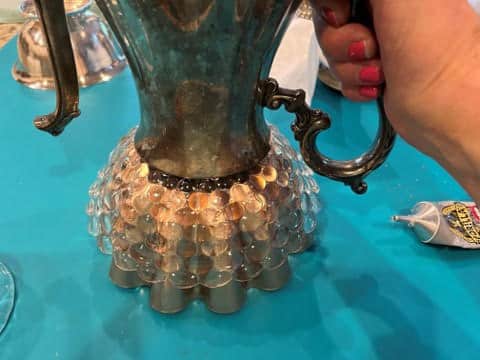
Attaching the teapot to the dress part
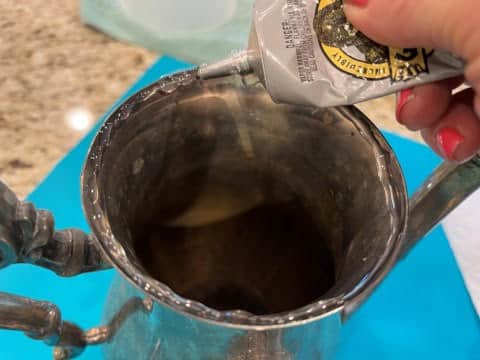
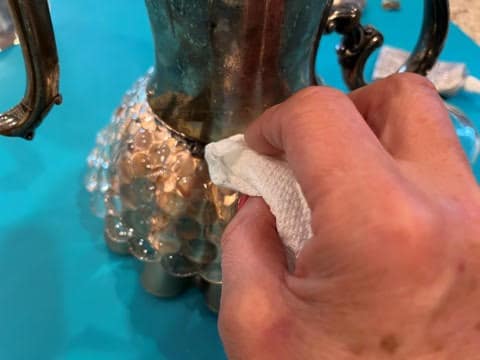
Add gorilla clear grip adhesive around the inside rim of the teapot then place it on top of your dress piece this will tell you where you need to add the adhesive on the dress piece. Remove the teapot add adhesive around the dress piece and then a little more adhesive around the rim of the teapot again. Let set for a minute or two then place the teapot on top of the dress. You might need to place something under the handle to make the teapot to stay in place. Let set for about 15 minutes or so before moving onto the next step.

Attaching the head and hat
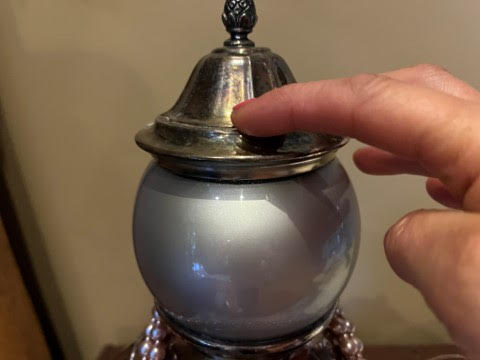
To attach the head to the body place the head onto the body to see where the touches the body next add gorilla adhesive to the rime of the head and to the body (bottom of the teapot). Let set for about two minutes then attach the head to the body. Let set about 10 minutes before moving onto the next step.
For the next step I forgot to take pictures of adding the adhesive but I am sure you will understand the directions without the photos. Place the teapot lid on top of the head to see where it touches add the gorilla clear grip adhesive to the hat then place back onto the head then remove. This will show you where you need to add the adhesive to the head. Add the adhesive to the head and add a little more to the hat then glue the heat to the head. Your teapot garden girl is all done! Let set for 24 hours before placing onto the copper pipe out in your garden.
I hope you enjoy making the teapot garden girl I think she just turns out adorable. For a finishing touch you can add a necklace to her.
perfect!!
Brilliant. Love them. Thank you for sharing your work.
This is truly adorable and a wonderful us for those silver teapots sitting in every thrift store. Thanks for sharing.
Beautiful! What are you using for the head?
Beautiful, can you tell me what you used for the head?